Getting your photo right is one of the most important steps when applying for an Indian e‑Visa. A wrong photo can get your application rejected before anyone even looks at it. This complete guide shows you exactly what your photo needs to look like, common mistakes to avoid, and how to take a perfect picture at home.
Key Takeaways
- Photo must be in JPEG format with file size between 10 KB and 300 KB.
- Dimensions must be square, minimum 350 x 350 pixels, maximum 1000 x 1000 pixels.
- Background must be plain white or light colored with no shadows.
- Your face must be fully visible from top of hair to bottom of chin.
- No glasses allowed for e‑Visa photos.
- Head size should measure 25mm to 35mm (1″ to 1 3/8″).
- Photo must be taken within the last 6 months.
Official Indian e‑Visa Photo Specifications
The Indian government has strict rules about what your e‑Visa photo should look like. Here are the exact specifications you must follow.
Digital Photo Technical Requirements
| Specification | Requirement |
|---|---|
| File format | JPEG only |
| Minimum file size | 10 KB |
| Maximum file size | 300 KB (up to 1 MB for some e‑Visas) |
| Minimum dimensions | 350 x 350 pixels |
| Maximum dimensions | 1000 x 1000 pixels |
| Aspect ratio | Square (height = width) |
| Recommended DPI | 300 DPI |
Physical Photo Requirements (Regular Sticker Visa)
If you are applying for a regular visa at a consulate, printed photos must follow:
| Specification | Requirement |
|---|---|
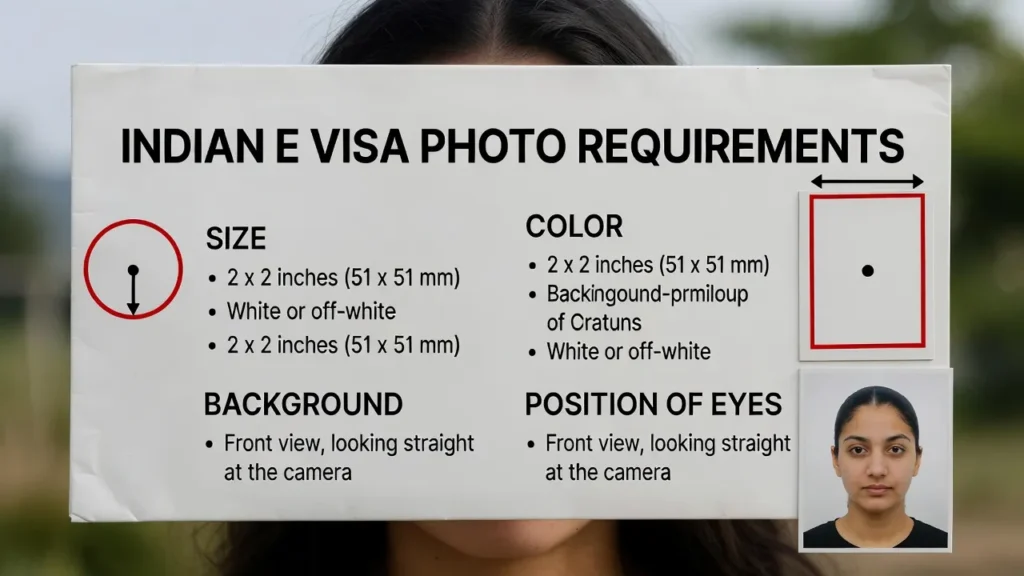
| Print size | 2 x 2 inches (51mm x 51mm) |
| Head size | 25mm–35mm from chin to top |
| Eye height | 28mm–35mm from bottom of photo |
| Paper type | Glossy photo paper |
Pro tip: For regular sticker visas, the digital photo and printed photo should be identical.
Photo Composition Guidelines
Your face position and expression are just as important as the technical specs.
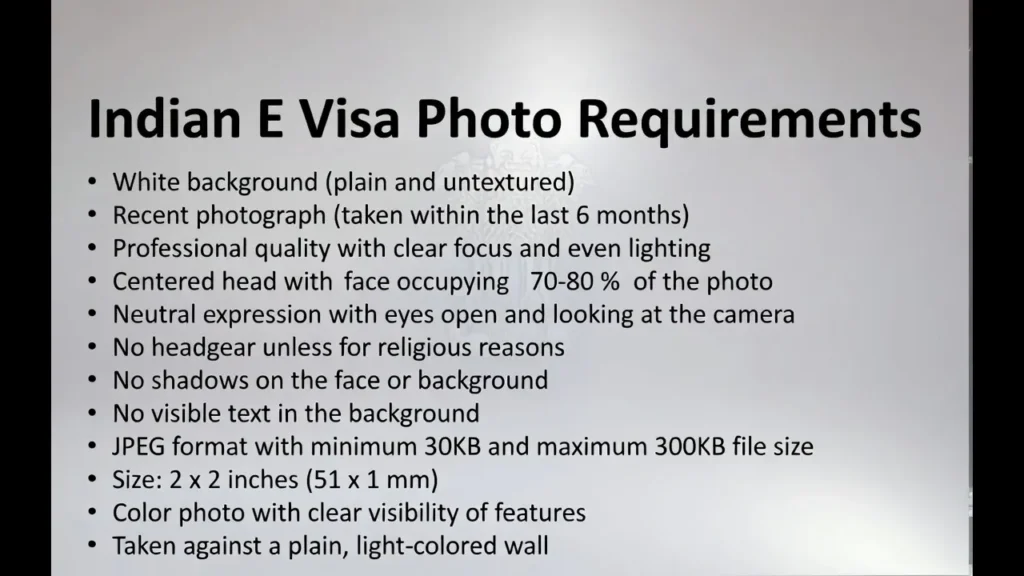
Face Position and Expression
- Face the camera directly (full frontal view).
- Keep your eyes open and clearly visible.
- Maintain a neutral expression with mouth closed.
- Do not smile, frown, or raise eyebrows.
- Your head must be centered in the frame.
- Both ears should be visible if possible.
- Neck and upper shoulders must appear in the photo.
What Must Be Visible
Your photo should clearly show:
- Full head including hair.
- Both eyes.
- Nose and mouth.
- Chin, jawline, and neck.
- Upper shoulders.
Background Requirements
The background must be plain and uncluttered.
Acceptable backgrounds:
- Plain white (best).
- Very light or off‑white.
Not acceptable:
- Patterns or textures.
- Dark or bright colors.
- Visible objects or furniture.
- Any shadows behind you.
Even small shadows or visible lines on the wall can cause rejection.
What to Wear in Your Photo
Your clothing affects contrast and clarity.
Clothing guidelines:
- Wear dark or medium‑colored clothing that contrasts with a white background.
- Normal daily clothes are fine.
- Avoid white or very light tops that blend into the background.
- Do not wear uniforms.
Head Coverings and Accessories
| Item | Allowed? | Notes |
|---|---|---|
| Religious head coverings | Yes | Face must be fully visible |
| Hats/caps (non religious) | No | Not allowed |
| Glasses (any type) | No | Must be removed for e‑Visa |
| Sunglasses | No | Never allowed |
| Headphones/earbuds | No | Remove before photo |
| Large earrings | Avoid | Can distract or cast shadows |
Important: Glasses are strictly not allowed in Indian e‑Visa photos, even prescription glasses.
How to Take Your Indian Visa Photo at Home
You can take a compliant photo at home with a smartphone if you follow these steps.
Step 1: Set Up Your Space
- Find a plain white or light‑colored wall.
- Stand about 4–6 feet away from the wall to avoid shadows.
- Position yourself near a window for soft natural light.
- Ensure there are no objects in the background.
Step 2: Camera Position
- Use the rear camera of your phone for better quality.
- Use a tripod or ask someone to take the photo.
- Position the camera at eye level.
- Do not use portrait mode (it may blur the background artificially).
Step 3: Lighting
Good lighting is critical:
- Use natural daylight where possible.
- Face the light source (window or lamp).
- Avoid harsh, direct overhead lights.
- Ensure no shadows fall on your face or background.
- Avoid backlighting (light coming from behind you).
Step 4: Take Multiple Shots
- Take several photos with slight adjustments.
- Check each one for sharpness, shadows, and framing.
- Confirm your eyes are open and expression neutral.
How to Edit Your Photo to Meet Requirements
After taking your photo, you may need to crop and resize it.
Resizing with Microsoft Paint (Example)
- Right‑click the photo and choose Open with → Paint.
- Under View, enable the Status Bar to see dimensions.
- Use Select to crop a square around your head and shoulders.
- Watch the Status Bar to keep dimensions between 350 x 350 and 1000 x 1000 pixels.
- Click File → Save As → JPEG picture.
Checking Photo Properties
- Right‑click the image file → Properties.
- Go to the Details tab.
- Confirm dimensions and that file size is 10–300 KB.
Common Photo Mistakes That Cause Rejection
Many e‑Visa denials come from photo issues. Common problems include:
Technical Errors
- Wrong file format (e.g., PNG instead of JPEG).
- File larger than 300 KB or smaller than 10 KB.
- Non‑square image or dimensions outside 350–1000 pixels.
- Blurry or pixelated image (low resolution).
Composition Errors
- Face not centered.
- Top of head or chin cut off.
- Eyes closed or looking away.
- Smiling, frowning, or exaggerated expression.
- Head tilted or turned.
Background and Lighting Errors
- Shadows on face or background.
- Dark, colored, or patterned background.
- Overexposed (too bright) or underexposed (too dark).
Accessory Errors
- Wearing any kind of glasses.
- Non‑religious headwear (hats, caps).
- Hair covering eyes or significant part of the face.
Uploading Your Photo to the e‑Visa Application
During the online application, the system will check your photo automatically.
Upload steps:
- On the photo page, click Upload Image (usually on Page 3).
- Click Browse and select your JPEG file.
- The system checks the format and basic constraints.
- If accepted, a preview appears; click Confirm.
- A confirmation message asks you to verify the photo.
If the image doesn’t meet basic rules (format, size, dimensions), you’ll see an error and must upload a corrected photo.
Indian e‑Visa Photo vs Regular Visa Photo
There are small but important differences:
| Feature | e‑Visa Photo | Regular Sticker Visa Photo |
|---|---|---|
| Max file size | Up to ~1 MB (in some cases) | Typically up to 300 KB |
| Glasses allowed | No | Strongly discouraged |
| Physical print | Not required | Yes (2 x 2 inch prints) |
| Submission | Digital upload only | Digital + physical photos |
Always check the specific instructions for your visa category, as consular requirements can vary slightly from online e‑Visa rules.
Tips for Getting Your Photo Approved
Before you shoot:
- Remove jewelry that can reflect light.
- Comb or tie hair away from your face.
- Clean your camera lens.
- Take test shots to fine‑tune lighting.
When shooting:
- Look straight into the camera.
- Keep shoulders square and level.
- Maintain a relaxed, neutral expression.
- Stay still when the photo is taken.
After shooting:
- View the image at full resolution.
- Check for blur, noise, or shadows.
- Confirm the background is completely plain.
- Ensure your head fits comfortably in the frame and is centered.
Frequently Asked Questions
What size should my Indian e‑Visa photo be?The digital photo must be square, with dimensions between 350 x 350 and 1000 x 1000 pixels, and file size between 10 KB and 300 KB, in JPEG format.
Can I wear glasses in my Indian e‑Visa photo?No. Glasses are not allowed, even prescription glasses. Remove them before taking the picture.
What background color is required for Indian visa photos?The background must be plain white or light colored with no patterns or objects. A smooth white wall is ideal.
Why was my Indian e‑Visa photo rejected?Common reasons: incorrect format (not JPEG), wrong dimensions, file size too large/small, shadows, wearing glasses, tilted head, or face not fully visible.
Can I take my Indian visa photo with a smartphone?Yes. A smartphone camera is acceptable if you use good lighting, a plain background, and then crop/resize correctly before uploading.
How recent does my Indian visa photo need to be?Your photo should be taken within the last 6 months and reflect your current appearance.
Helpful Resources
- Official Indian Visa Online Portal: https://indianvisaonline.gov.in
- Official Photo Upload Instructions (PDF): https://indianvisaonline.gov.in/visa/VSS_IMAGE.pdf
- VFS Global India Visa Services: https://www.vfsglobal.com
Take your time to get the photo right. A compliant, high‑quality photo makes your Indian e‑Visa application smoother and reduces the risk of delays or rejection.
Related Articles
- Key UK Visa Types & How to Get Them
- F-1 Visa Denied Under 214(b)? What It Actually Means and How to Reapply the Right Way
- How to Get a Brazil Visa: Step-by-Step Guide
Official sources to check before you apply or travel
- GOV.UK foreign travel advice (entry requirements by country)
- Government of Canada travel advice and advisories
Visa rules, fees, processing times and entry requirements change often. Always confirm the current requirements on the official government website, or with the embassy or consulate, before you apply, pay or travel. One Visa Center is an independent information site, not a law firm or government agency, and this article is not legal advice. Read how we research, fact-check and use AI tools in our Editorial Policy.
Get visa, passport, and travel-planning guides like this one sent straight to your inbox — plus first access to new country guides and scholarship roundups.